
Last Updated on 3 April, 2026
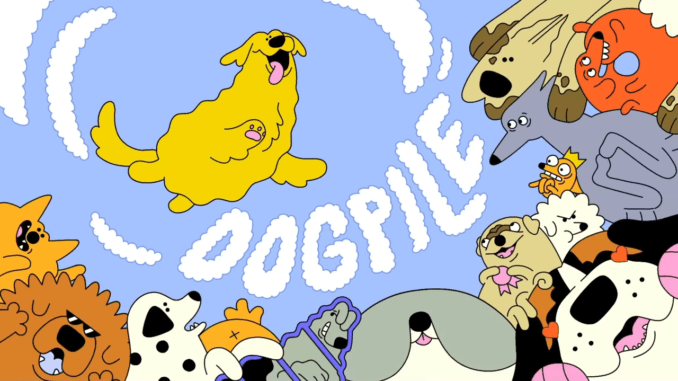
Dogpile brilliantly combines physics based puzzle mechanics with deep deck building strategy to create a uniquely chaotic merging experience. Many players struggle to manage the overflowing play area and punishing disciplines that quickly ruin a promising run. This comprehensive guide solves those exact frustrations by breaking down optimal card synergies and crucial yard space management tactics. By following these proven strategies, you will consistently transform tiny Aces into towering game winning Kings.
Table of Contents
The Core Objective
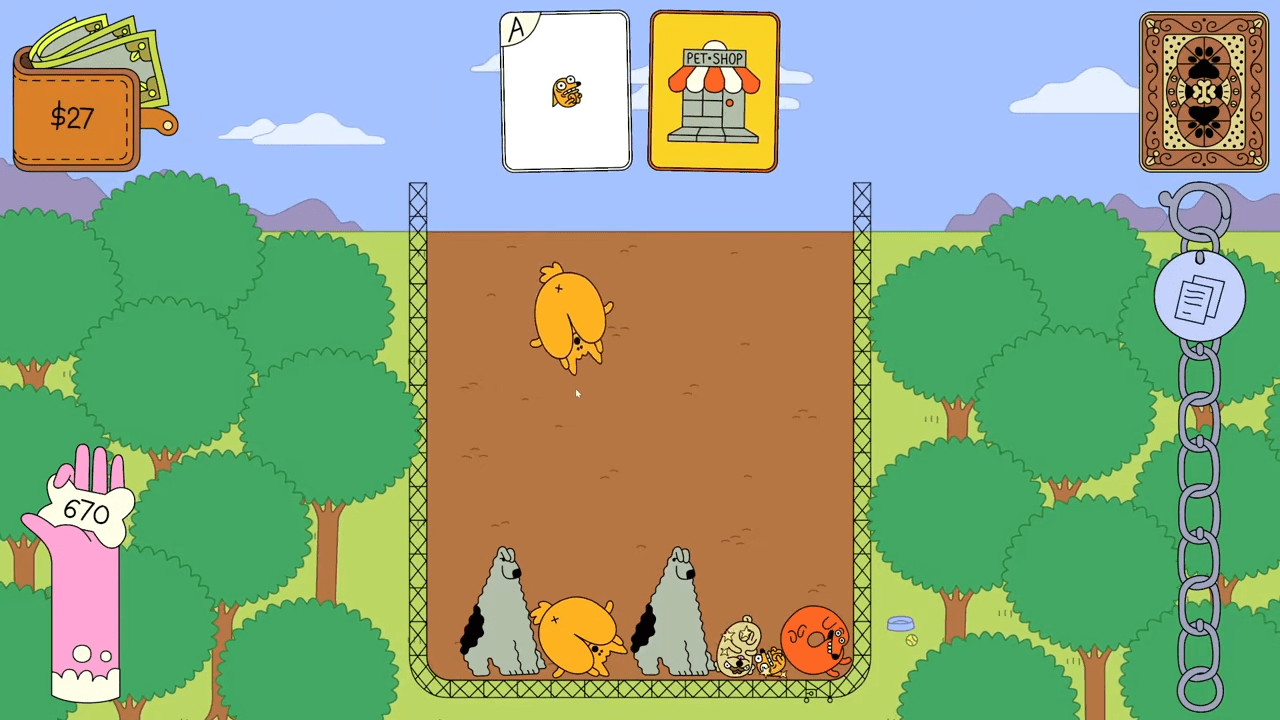
Your ultimate pursuit in Dogpile revolves around creating a King size dog. You accomplish this grand task by combining dogs of smaller proportions. You play the game by dropping dog cards from your hand straight into the Yard. Whenever two dogs sharing the exact same size make physical contact, they instantly fuse together to spawn a brand new dog exactly one size larger. For example, tossing two Aces into the play area causes them to fuse into a 2. Once you exhaust all the cards in your hand, you simply draw a fresh set from your deck. The match continues seamlessly until you successfully materialize a King in the Yard or until your towering pile of dogs spills out of the Yard for more than 10 seconds.
Throughout your run, you collect two vital currencies: money and bones. You spend your hard-earned money at the Pet Shop to buy additional dogs for your deck or powerful tags for your collar. These tags grant you potent enhancements that interact together to secure your win. You gather bones to satisfy your designated bone goal. Whenever you generate enough bones to meet this target, the game grants you access to the Dog Wash. At this station, you can heavily modify and enhance your existing deck.
If you fail to generate the required number of bones within a strictly allotted number of hands, the game subjects you to a discipline. These disciplines impose severe disadvantages on your strategy and physics management.
Navigating the Interface
Understanding your screen layout ensures you make the quickest and most efficient tactical choices during gameplay.
The Central Merging Zone
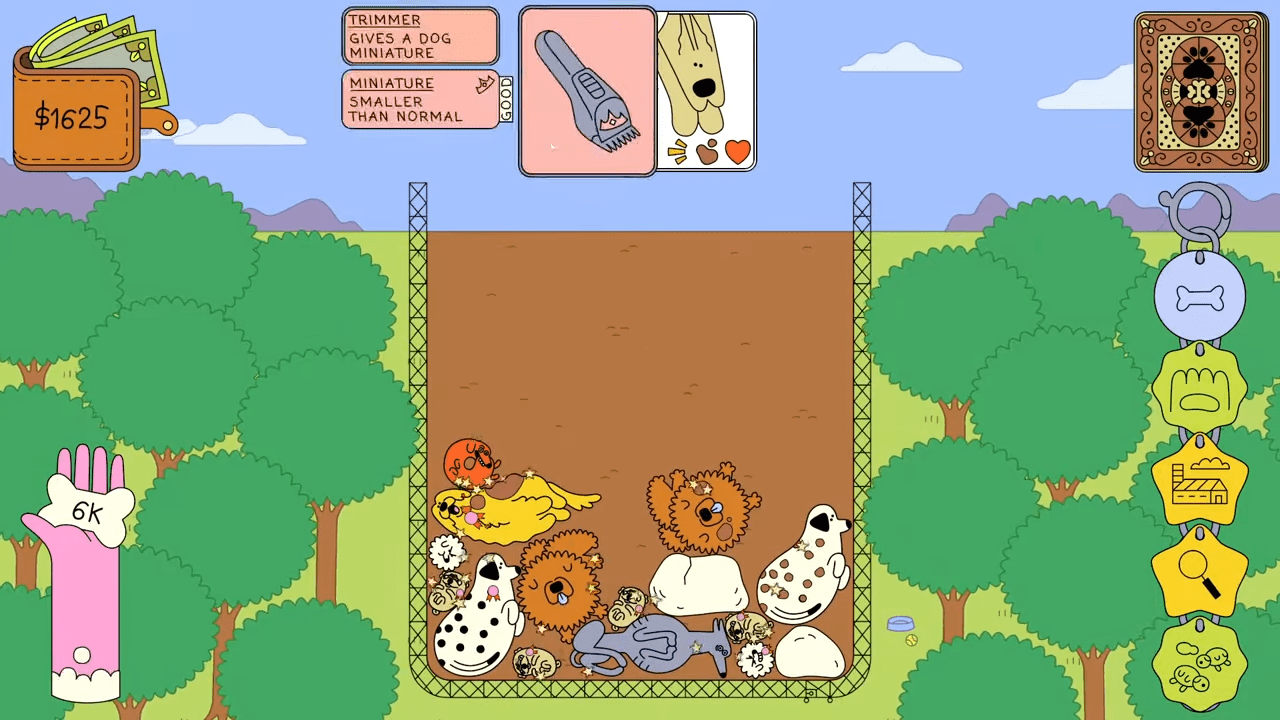
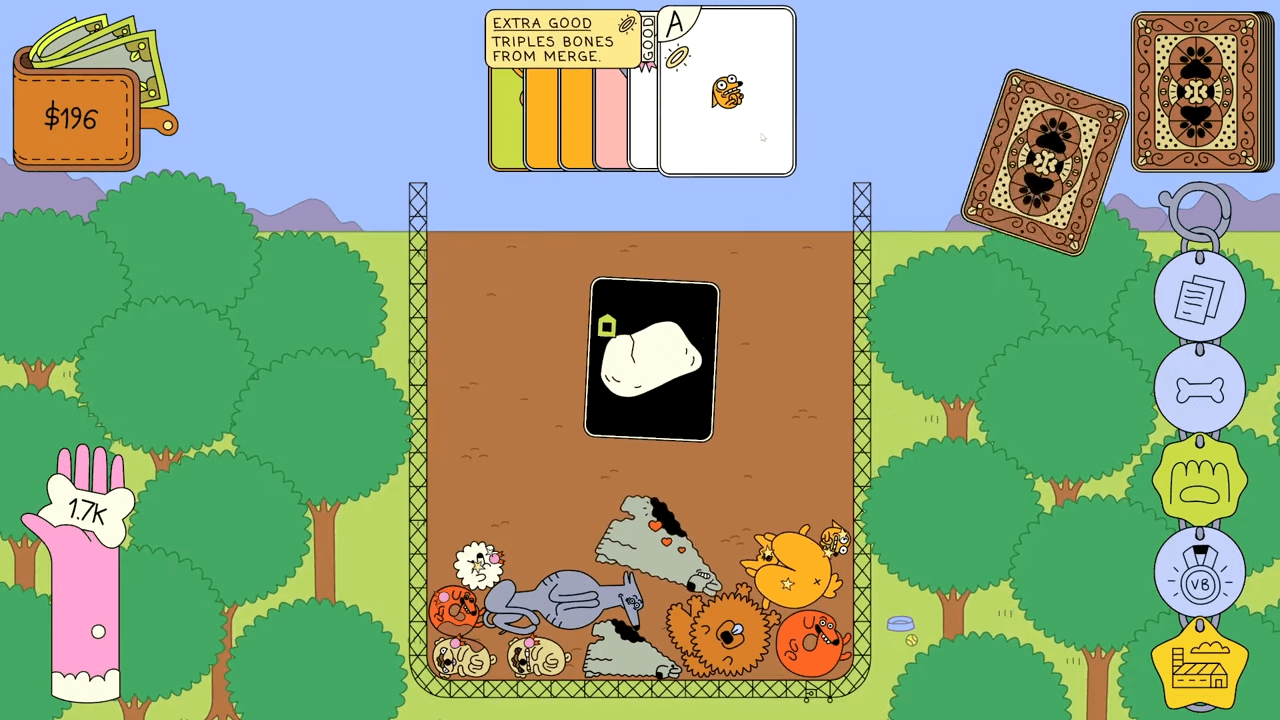
The Yard occupies the dead center of your screen. This acts as your primary drop zone. Placing your cursor over any dog currently sitting in the Yard reveals its specific characteristics, its exact size, and the precise number of bones it will generate upon a successful merge.
Your Current Options
Your hand floats directly above the Yard, showcasing the exact cards you can presently deploy. You hold three cards by default. Hovering over any card displays its detailed stats. To deploy a card, click and drag it downward until the background UI disappears, then release your mouse button to let it fall. If you change your mind mid-drag, you simply drag the card back up into your hand area before releasing the mouse button to cancel the action. You generally must play every single card in your hand to conclude your turn and draw replacements.
The Roster and Discard Pile
Your deck sits proudly in the upper right corner of the interface. Clicking this deck icon shows you exactly which cards remain in your draw pile and which ones sit in your discard pile. The game sends played cards directly to the discard pile. Once you deplete your draw pile entirely, the game shuffles your discard pile and recycles it into a fresh draw pile. Hovering your cursor over the deck provides a fantastic summary of your remaining draw count, your discard count, your current hand size, and the specific ruleset of your chosen deck.
Your Accessory Belt
Located on the far right, your collar holds your purchased tags. You possess the capacity to equip up to five tags at any given moment. Hovering over a tag explains its mechanical benefit, and clicking it reveals its current sell value. You retain the ability to sell a tag at absolutely any time, even outside of the shop, by clicking the tag and hitting the sell button. You can also drag these tags around to keep your collar perfectly organized.
Finances and Milestones
The wallet sits in the upper left corner and tracks your current monetary funds. Hovering over this wallet reveals your base monetary gain per merge, which starts at $1 by default. The bone goal indicator rests on the left side, tracking the exact number of bones you need to reach the Dog Wash. Once your goal scales beyond 1K, hovering over the bone icon displays the exact numerical requirement. A banner positioned at the bottom right indicates your remaining hand count before a discipline triggers. You will also notice a book icon that opens a helpful glossary and a gear icon that opens your settings menu on the left side.
Scaling the Challenge
The game provides three distinct difficulty settings for every available deck. You initially start with access to the lowest difficulty, Chill. Conquering a difficulty setting permanently unlocks the tier above it.
- The Relaxed Experience: Chill serves as the baseline experience. The bone goals scale at a highly manageable pace, giving you ample time to build your deck and secure powerful accessories.
- The Tactical Hurdle: Clever maintains the exact same core objective as Chill, but the bone goals become significantly harder to achieve, demanding tighter deck optimization.
- The Ultimate Test: Turbo ramps the bone targets up to an overwhelmingly difficult degree. Furthermore, the game modifies the ultimate win condition. You must successfully merge two Kings together to win the game, rather than just creating a single King.
The Building Blocks
You will utilize three completely different categories of cards throughout your playtime.
The Canine Units
Dog cards represent the heart of your deck. Dogs exist in thirteen distinct sizes: Aces, 2s, 3s, 4s, 5s, 6s, 7s, 8s, 9s, 10s, Jacks, Queens, and Kings. The card displays its size clearly in the upper left corner. Dogs also feature a variety of good and bad traits, which the game represents visually with different symbols. You add dog cards permanently to your roster by purchasing them at the Pet Shop, and you permanently delete them from your deck by applying the Scissors treatment at the Dog Wash.
The Utility Actions
Trainer cards grant you the power to perform unique actions, apply temporary buffs to dogs currently sitting in the Yard, or instantly open specific menus. The game features exactly ten trainer cards:
- Cheese: Grants a dog the Friendly attribute.
- Doorbell: Grants a dog the Barky attribute.
- Bone: Grants a dog the Digs attribute.
- Trimmer: Grants a dog the Miniature attribute.
- Trophy: Grants a dog the Show dog attribute.
- Treat: Grants a dog the Extra Good attribute.
- Shampoo: Clears all detrimental attributes from a dog.
- Pet Shop: Opens the store to buy dogs and tags.
- Dog Wash: Opens the upgrade station to modify your deck.
- Leash: Returns a dog from the Yard back into your hand.
You buy most trainer cards at the Pet Shop. However, you can exclusively obtain the Pet Shop and Dog Wash trainer cards if your starting deck includes them by default. You cannot delete trainer cards from your deck once you acquire them.
The Clutter Elements
You acquire rock cards strictly from disciplines or from selecting the Pet Rock starting deck. These cards drop a useless, unmergeable rock into the Yard, taking up precious physical space.
Starter Loadouts
Before beginning a run, you select one of fourteen distinct decks. Each deck dictates your starting dogs, your trainer cards, and unique mechanical twists. You begin with the Classic and Pedigree decks unlocked. Beating a deck unlocks the adjacent deck to its right.
Fundamental Experiences
- Classic: You begin with 25 gold and a standard array of dogs. The deck holds eleven dogs (one 5, one 4, two 3s, two 2s, five Aces) and one Pet Shop card.
- Pedigree: You play a stripped down version of the game containing zero Pet Shops, Dog Washes, bone goals, or tags. The deck holds six pristine dogs (two 3s, two 2s, two Aces).
Trait and Behavior Focus
- Misfits: Every starting dog possesses a random negative trait, but the game makes your first two tags completely free. The deck holds eleven dogs (sizes mirror Classic) and one Pet Shop card.
- Goody Two Shampoos: You start with Extra Good dogs and receive two Dog Washes every time you complete a goal. You suffer a one hand penalty per goal. The deck holds eleven dogs (one 5, one 3, one 2, and two Aces feature Extra Good) and one Pet Shop card.
- Overly Keen: You start with Friendly dogs. The game alters the rules so Friendly dogs gain Crated, and Crated dogs gain Friendly. The deck holds eleven dogs (one 5, one 3, one 2, and two Aces feature Friendly) and one Pet Shop card.
- Yap Battle: You start with Barky dogs. Dogs acquire Sleepy immediately after Barking. The deck holds eleven dogs (one 5, one 3, one 2, and two Aces feature Barky) and one Pet Shop card.
- Street Hounds: You start with Pack dogs. Triggering Pack with an empty draw pile forces a deck shuffle, and dogs played by Pack gain Fleas. The deck holds eleven dogs (one 5, one 3, one 2, and two Aces feature Pack) and one Pet Shop card.
Economic and Marketplace Shifts
- That’s Showbiz: You start with Show Dogs. The Show Dog trait grants an extra $4 on merge, but standard merges pay exactly $0. The deck holds eleven dogs (one 5, one 3, one 2, and two Aces feature Show Dog) and one Pet Shop card.
- The Means of Production: You start without a Pet Shop card. Shuffling your deck automatically adds a random dog to your deck and awards a random tag. The deck holds twelve dogs (one 5, one 4, two 3s, three 2s, five Aces).
- Pauper: You start with larger dogs, but the shop exclusively stocks common tags. The deck holds twelve dogs (one 7, one 6, one 5, three 4s, three 3s, two 2s, one Ace) and one Pet Shop card.
- Games as a Service: Everything inside the shop is entirely free, but opening the Pet Shop costs an ever increasing amount of money. The deck holds the exact same eleven dogs and one Pet Shop card as the Classic loadout.
Specialized Mechanics and Board Clutter
- Many Moles: You start with Dig dogs, numerous Aces, and a permanently reduced hand size. The deck holds eleven Aces (six feature Digs) and one Pet Shop card.
- Pet Rock: You start with rocks and the Squint tag equipped. The deck holds eight dogs (one 5, one 4, one 3, one 2, four Aces), three rocks, and one Pet Shop card.
- Squeaky Clean: You start with a Dog Wash card directly in your deck. You endure two separate disciplines simultaneously upon failing a goal. The deck holds ten dogs (one 5, one 4, two 3s, two 2s, four Aces) and two trainer cards (Pet Shop, Dog Wash).
Crucial Systems
The Marketplace
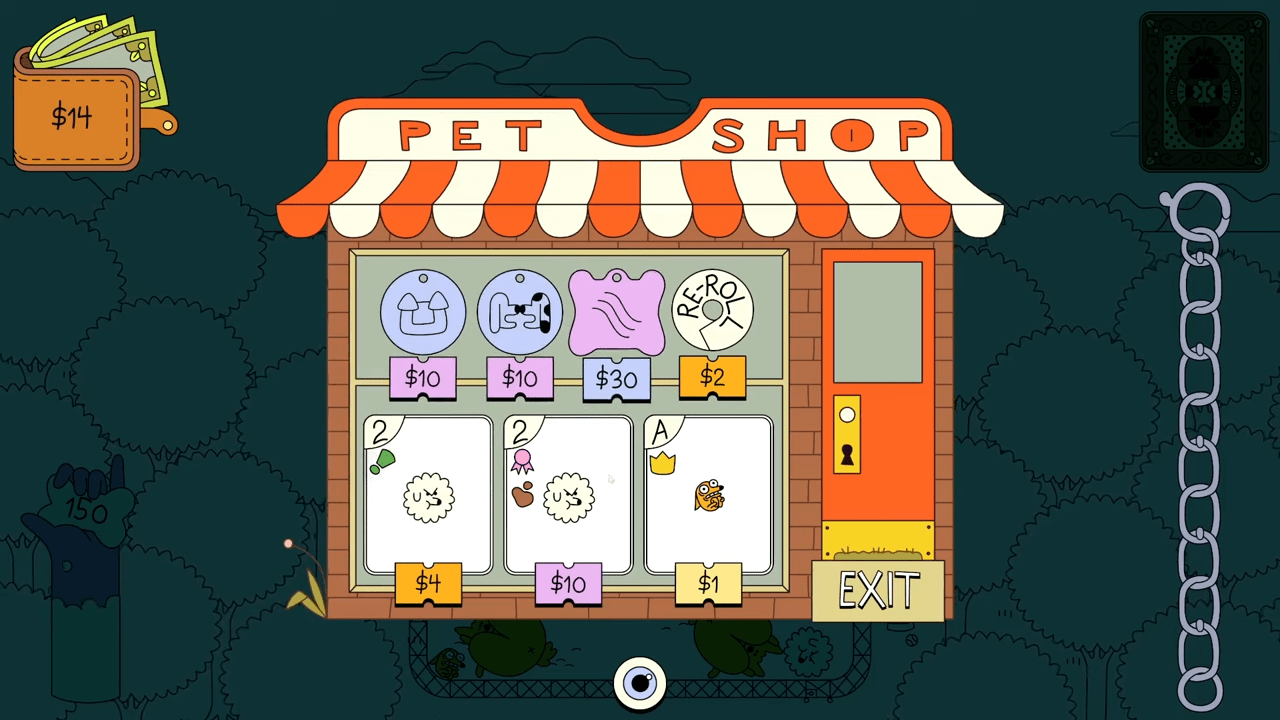
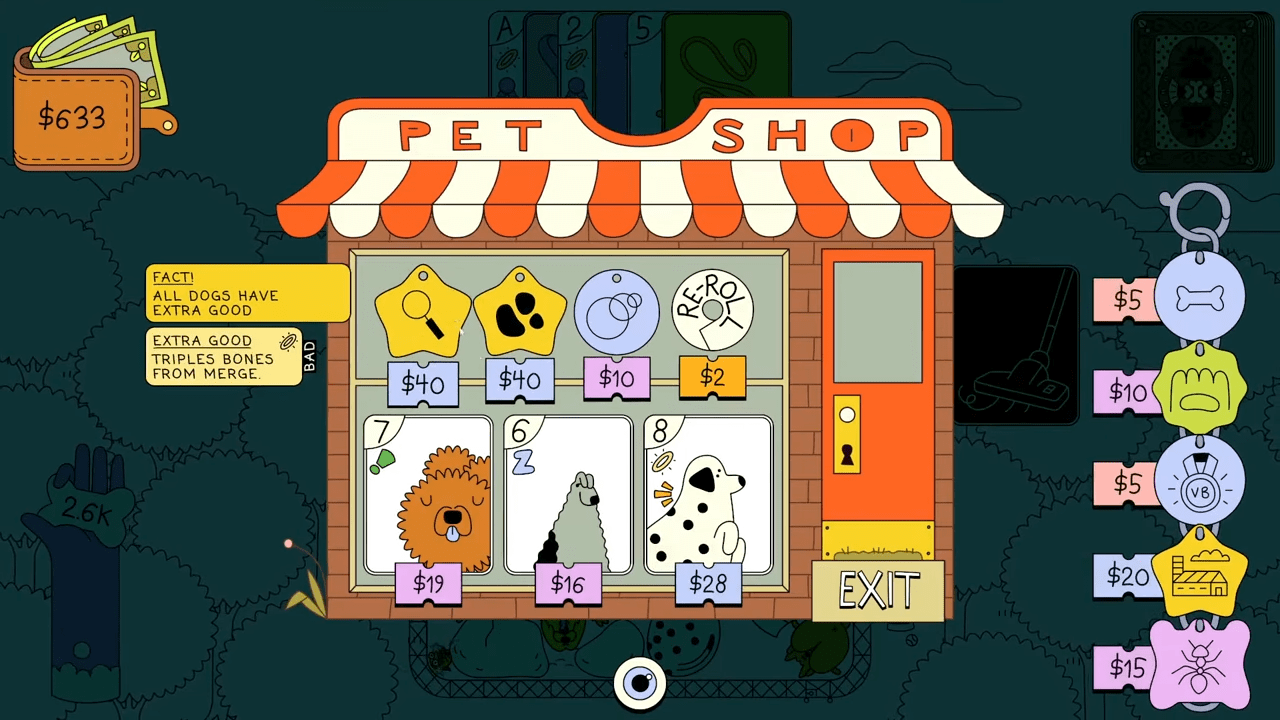
The Pet Shop grants you the ability to buy both tags and new dogs. The interface displays three tags and three dogs at a time. You spend money to re-roll these offerings. Your first re-roll costs $2, and the price jumps by an additional $2 for every subsequent re-roll. Higher rarity tags demand higher prices. The cost of a dog fluctuates depending heavily on its size and its specific combination of positive and negative modifiers.
The Upgrade Station
You must satisfy your bone goal to access the Dog Wash unless you run the Squeaky Clean deck. On Chill difficulty, your first target demands 300 bones within 5 hands. The target inflates by 300 each time, scaling to 600, 900, 1200, 1500, and 1800. On Clever and Turbo, your first target is 300, but your second target skyrockets to 1200. Subsequent goals increase by 600, scaling to 1800, 2400, and 3000.
Merging dogs produces bones based on the size of the participating canines. Larger dogs drop more bones. The glossary strictly lists the bone value per individual dog. Merging two Aces produces 20 bones, yielding 10 bones per Ace.
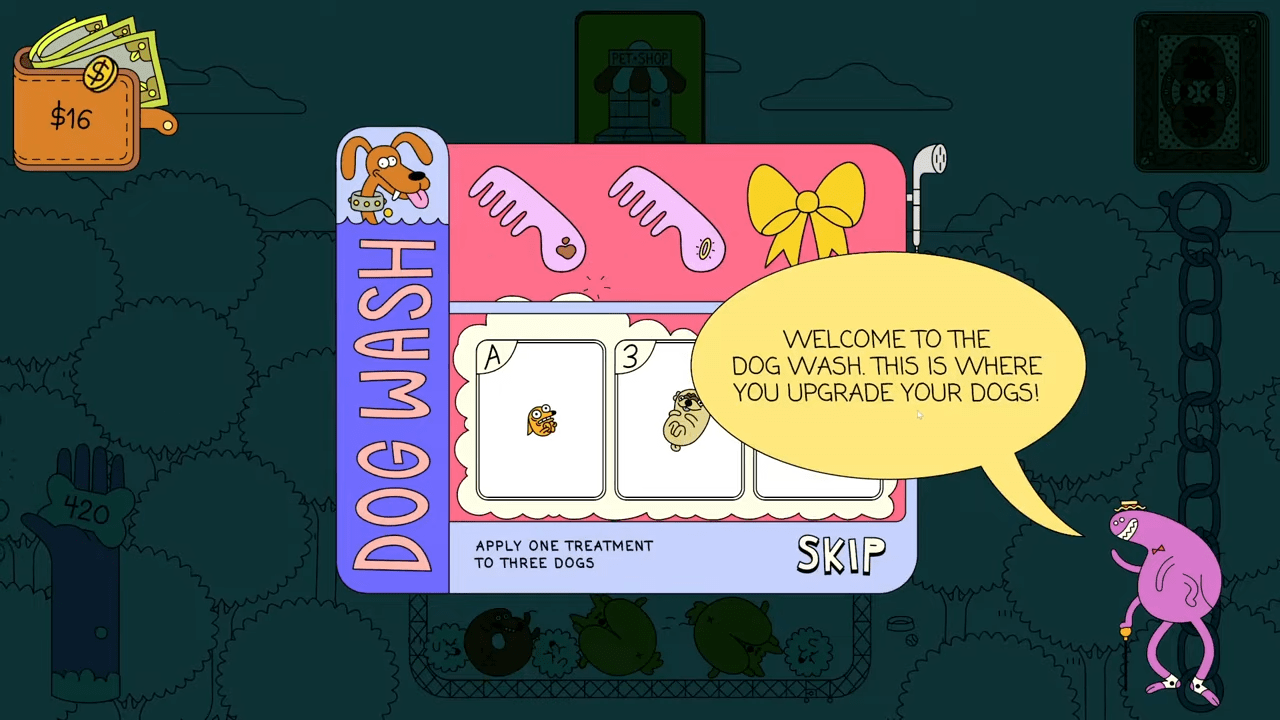
At the Dog Wash, the game randomly pulls three dogs from your combined hand and deck. You select one of three randomly generated treatments to apply uniformly to all three cards:
- Traits (1-3): Imprints the selected trait onto all three dogs. The Stinky Soap tag allows negative modifiers to populate this list.
- Scissors: Permanently obliterates the three dogs from your entire deck.
- Ribbon: Permanently elevates each dog by exactly one size rank.
- Soap: Washes away all negative modifiers from the three dogs.
Penalties
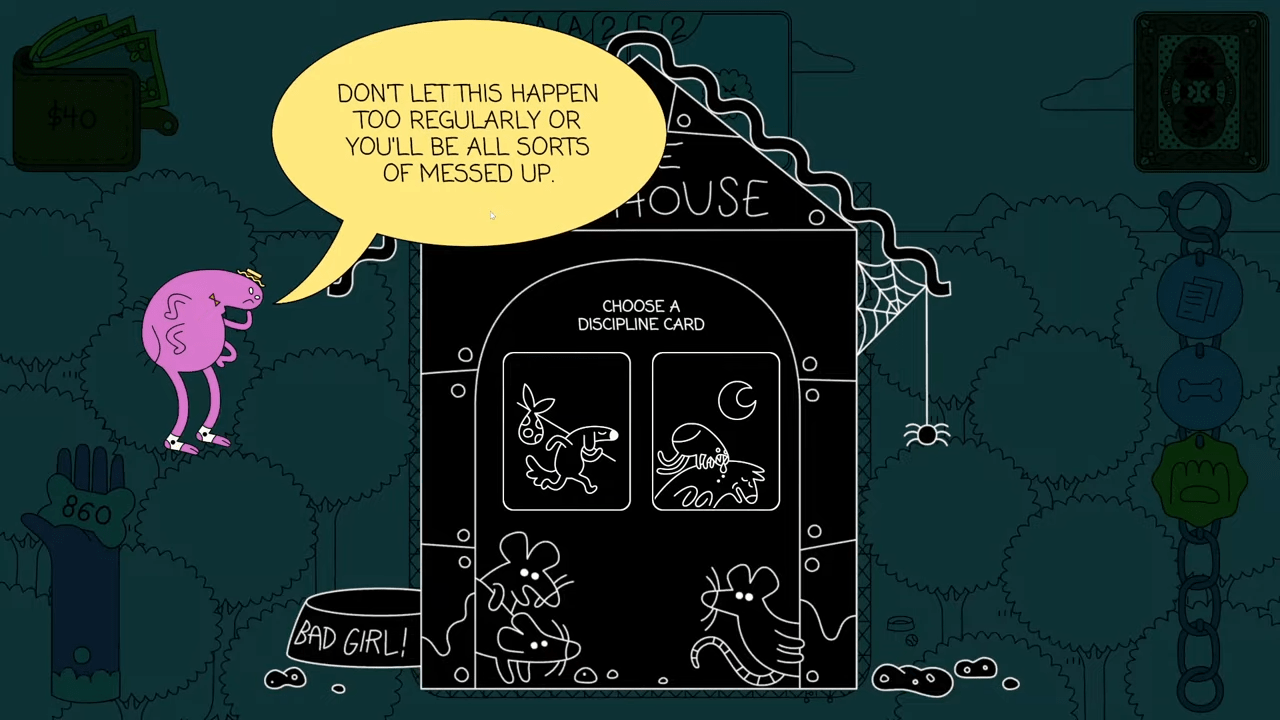
Failing to hit the bone target before exhausting your allowed hands forces you to pick between two debuffs known as disciplines. These debuffs sabotage your Yard space, your played cards, or your draw pile. Taking a discipline does not reset your bone target. You simply gain a fresh batch of hands to reach that exact same target from wherever your score previously rested.
Characteristics and Attributes
Attributes dictate the physical and mechanical behavior of your dogs. While the game categorizes these as good or bad, brilliant players utilize specific tags to turn terrible traits into massive advantages. Printed traits remain permanent on the card but generally wipe clean when the dog merges. Trainer cards apply traits to dogs currently sitting in the Yard, but these applications remain temporary and never alter the card in your deck.
Beneficial Modifiers
- Miniature: Shrinks the dog down. This incredible modifier clears up Yard space and makes squeezing into tight gaps much easier. A dog possessing both Royal and Miniature retains its completely normal default size.
- Show Dog: Yields an extra $2 per dog upon a successful merge. Merging one Show Dog with a regular dog pays out $3 instead of $1. Merging two Show Dogs pays out $5. The math calculates as M = (1 + 2s), where “s” equals the number of Show Dogs involved. Merging two Show Dogs and two non-Show Dogs ultimately pays $5 + $1 = $6. Merging a non-Show Dog with a Show Dog twice over also pays $3 + $3 = $6. You suffer no financial penalty for combining Show Dogs with each other.
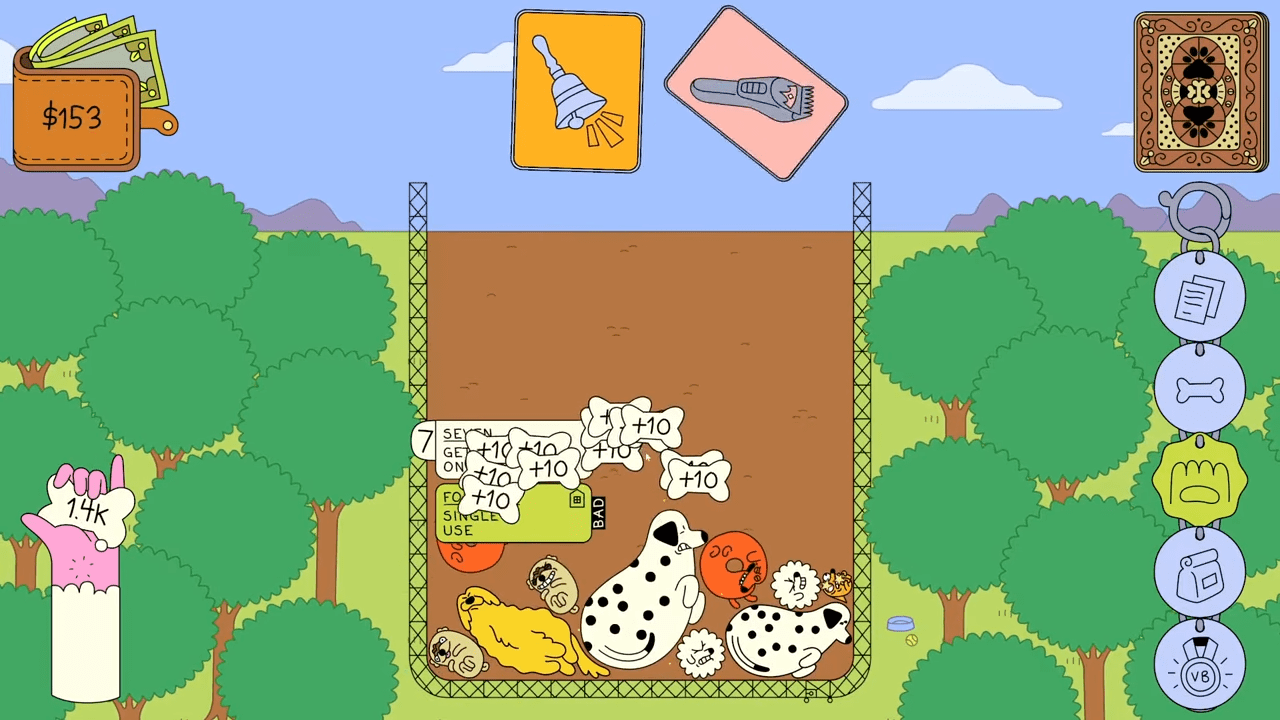
- Extra Good: Doubles your bone output on a merge. The game does not stack this multiplier if both dogs feature the trait. Merging one Extra Good dog with a normal dog provides the maximum mathematical value. Merging a non-Extra Good Ace with an Extra Good Ace twice generates exactly 80 bones: ((10 + 10) x 2) + ((10 + 10) x 2) = 80. Merging two Extra Good Aces together, and then two normal Aces together, only generates 60 bones: ((10 + 10) x 2) + (10 + 10) = 60.
- Friendly: Forces the dog to aggressively hunt down other dogs of the exact same size. This behavior triggers immediately upon play and reactivates whenever a matching dog hits the Yard.
- Digs: Commands you to draw one card per merged dog. Merging two Dig dogs draws two total cards.
- Barky: Repels other dogs away whenever the Barky dog strikes a physical object or the ground. This vigorously agitates the pile.
- Pack: Automatically rips another dog straight from your deck and throws it into the Yard near the originally played card.
- Exceptional: An invisible, unlisted status referenced strictly by the Hidden Gem tag. This means the dog miraculously possesses every single beneficial modifier at once.
Detrimental Modifiers
- Royal: Enlarges the dog drastically. This clogs up your play area and accelerates overflow conditions.
- Fostered: Renders the card single use. The card destroys itself immediately after you play it.
- Timid: Forces the dog to actively flee from other dogs of the identical size. Applying both Timid and Friendly to a dog neutralizes both effects entirely.
- Crated: Locks the dog completely, preventing it from merging for two full hands.
- Fleas: Disables every other trait printed on the card.
- Cool: Operates strictly as a cosmetic visual change. However, it activates specific tags that require bad traits to function.
- Sleepy: Transforms the dog into a heavy, immovable object.
Tactics for Success
Mastering Dogpile requires you to juggle physics management, penalty mitigation, and roster curation simultaneously.
Physics Control
You must treat the game as a physics simulator to maximize your merges. Tiny dogs bounce violently. You can easily bounce Aces and 2s far away from your initial drop point. Larger dogs operate perfectly as heavy wedges. If you need to force two small dogs together, drop a colossal dog directly between them to push them around. Always exercise extreme patience. Let your Barky, Friendly, and Timid dogs settle completely before you commit to dropping your next card.
Mitigating Penalties
You will face disciplines on higher difficulties, so managing them becomes an essential skill. Prioritize taking disciplines that activate your specific tag synergies. If you run the Abolish Crates! strategy, taking a Crated discipline actually accelerates your win condition. If you lack synergies, always select the discipline with the shortest active lifespan. Penalties that target dogs strictly in the Yard usually vanish entirely after a few quick merges. Finally, select disciplines you can easily erase. Taking a Royal trait on a deck card hurts temporarily, but you can effortlessly fix it with Scissors or Soap at your next Dog Wash visit.
Roster Curation
Controlling the exact number of cards in your deck dictates your consistency. Applying Scissors to weak cards at the Dog Wash drastically improves your draw quality. You start with a very small roster, so cutting a few bad cards changes your odds dramatically.
Selecting the Best Attributes
During the early game, you must prioritize attributes in a very strict order: Digs > Pack > Show Dog > Extra Good. Digs and Pack are absolutely mandatory for flooding the Yard with enough bodies to meet escalating bone goals. Show Dog secures early money for tags, while Extra Good secures your Dog Wash visits.
You must avoid Friendly, Barky, and Miniature during the opening stages. You have an empty Yard, rendering movement and size reduction completely useless. Applying Ribbon to tiny dogs also hurts your bone economy early on. Generating three pairs of 3s via Digs yields 90 bones. Upgrading those 3s to 4s yields 120 bones, a minor increase of 30. However, using Digs to flood the board with just one extra pair of 3s nets you an additional 60 bones for that specific hand. Flooding the board always beats upgrading early on. Reserve Miniature strictly for dogs size 7 and above.
Accessory Prioritization
Your early tag purchases should focus entirely on securing money, boosting bones, or mitigating your starting deck’s core gimmick. Once you stabilize your economy, you slowly trade those early tags out to construct one of the top tier winning synergies listed below.
Ultimate Winning Combinations
Assembling the right tags transforms a desperate run into a guaranteed victory. Here are several combinations proven to conquer the Yard.
Amazing Ace
- Core Tags: Rags to Riches, Bad Influence, Little Litter.
- Support Tags: A persistence tag, Excavator, Should Have Been Fixed, A Sleeve Full, Aces High.
- Strategy: You load your deck with Aces featuring Digs and Pack. Little Litter summons three additional Aces every single time you trigger Pack. Rags to Riches and Bad Influence permit your flea infested Aces to fuse with absolutely any dog under size 10, plus Jacks, Queens, and Kings. Digs and Excavator keep your deck cycling forever. You blindly toss Aces until a King appears.
- Best Loadouts: Classic, Many Moles, Street Hounds.
That’s a Rock Fact!
- Core Tags: Hidden Gem, Squint.
- Support Tags: Snip Snip, Seven Did What?, A persistence tag, The Farm, Role Reversal.
- Strategy: Hidden Gem awards you an Exceptional dog every time you eliminate a rock. Squint forces the game to treat rocks as 2s, enabling them to merge and clear themselves effortlessly. Snip Snip and The Farm purge all weak cards from your deck, ensuring you only draw massive Exceptional dogs.
- Best Loadout: Pet Rock.
Ding Dong Bing Bong
- Core Tags: Ding.
- Support Tags: Bone boosting tags, Overachiever.
- Strategy: Ding intercepts your Dog Wash visit upon completing a goal and automatically promotes every single card in your deck instead. Pair this with insane bone generation and the Overachiever tag to trigger massive, compounding deck wide promotions constantly.
- Best Loadout: Goody Two Shampoos.
Laika Boss
- Core Tags: Laika.
- Support Tags: CEO, Bouncy Castle, Jupiter, Air Bud.
- Strategy: Laika automatically promotes any dog that flies completely off the screen. CEO adds an additional promotion rank to the event. You stack bounce mechanics and Barky traits to violently eject a Jack from the screen, instantly transforming it into your game winning King.
- Best Loadouts: Any.
Abolish Crates!
- Core Tags: Organised Play.
- Support Tags: Storm Warning.
- Strategy: Organised Play completely overrides the size requirement for Crated dogs, allowing any Crated canine to merge with any other Crated canine. Storm Warning rapidly infects your entire Yard with the Crated status.
- Best Loadout: Overly Keen.
You’re Adopted
- Core Tags: Adoption Day.
- Support Tags: Snip Snip, Excavator, Show’s Over, Alpha.
- Strategy: Adoption Day instantly rescues the 5 smallest dogs from the Yard during a shuffle. You force constant deck shuffles to surgically extract dogs from the play area, preventing overflow and allowing you to curate perfect merges. Keep your hand size below the 9 card limit to prevent the game from discarding your rescued dogs.
- Best Loadout: Street Hounds.
Ouroboro5
- Core Tags: Ouroboros.
- Support Tags: CEO, Smidge.
- Strategy: Ouroboros devolves merged 5s into 4s while simultaneously promoting a random dog elsewhere in the Yard. Smidge feeds your hand a steady supply of 5s. You basically burn 5s as fuel to randomly upgrade the rest of your board.
- Best Loadouts: Any.
Dog Tired
- Core Tags: Living Rug.
- Support Tags: Slippers, Sweet Dreams, Stay!, CEO, Sit!, Let them Lie, Storm Warning.
- Strategy: Living Rug allows Sleepy dogs to merge downward into smaller sizes. You flood your deck with Sleepy dogs using support tags. The immense physical weight of the Sleepy dogs keeps your pile perfectly flat while providing flexible downward merge paths.
- Best Loadout: Yap Battle.
Satanic Panic in the Dog Park
- Core Tags: Dark Ritual, Organised Play.
- Support Tags: Economy tags.
- Strategy: Dark Ritual obliterates 5 identical dogs in the Yard to summon a Demon (a red Queen with Crated, Timid, and Royal). You drop four Aces, then drop a fifth Ace on top of another dog to instantly summon two Demons side by side. They immediately fuse into a King.
- Best Loadouts: Any.
It Belongs in a Museum!
- Core Tags: Archaeologist, Dig Deep.
- Support Tags: Excavator.
- Strategy: Archaeologist alters your Digs trait to fetch the largest dog in your draw pile. Dig Deep alters it to fetch two cards. Use Scissors to thin your deck, and use Excavator to ensure your draw pile always has cards. You endlessly pull massive 9s and 10s straight into your hand.
- Best Loadout: Many Moles.
Extra Extra Good
- Core Tags: Fact!, Teamwork.
- Support Tags: CEO.
- Strategy: Fact! forces the Extra Good attribute onto every single dog. Teamwork automatically promotes the result of any merge involving two Extra Good dogs. Add CEO into the mix, and merging two 10s instantly skips the Jack phase and produces a King.
- Best Loadout: Goody Two Shampoos.
Hidden Mechanics and Quirks
With so many interlocking systems, Dogpile features numerous obscure interactions. Knowing exactly how the game resolves these mechanical overlaps provides a massive advantage.
Deck and Discipline Quirks
- The Pound: This discipline strictly avoids granting Friendly in the Overly Keen deck. However, the Separate discipline functions normally and grants Friendly to the split dogs.
- Consolation Prize: This activates flawlessly upon a deck reshuffle because the game technically attempts a draw right before initiating the shuffle.
- Excavator: This tag instantly shuffles your discard pile back into your draw pile, but it does not execute a card draw. You must rely on Digs or Pack to actually pull cards from the newly shuffled deck.
- Archaeologist with Dig Deep: Dig Deep forces Archaeologist to pull two exact copies of the largest dog sitting specifically in your draw pile, not your whole deck. If your draw pile contains only one card, you receive only one copy.
Tag Conflicts and Priorities
- Roll Over vs. Air Bud: If you equip both tags simultaneously, Roll Over takes absolute priority. Your dogs will flip upside down instead of jumping.
- Best for Last vs. Ding!: Ding! overrides the Best for Last mechanic entirely. The final card you drop before completing the goal skips the Best for Last promotion.
- Squint: 2s and rocks only mimic each other for physical merging purposes. Squint never bridges other tag synergies. Holding Jurassic Bark alongside Squint will absolutely never cause your 2s to bark.
Economy and Score Multipliers
- Behaviourist: This tag drops the price of any Pet Shop dog to zero as long as it features at least one negative attribute. The dog can possess infinite positive attributes and still cost nothing.
- Store Credit: The game checks your exact financial spending at your most recent shop visit. Rerolls do not count as valid purchases. If you purchase nothing, the tag refunds you exactly $10.
- Aces High: The tag description claims a 10x multiplier, but the background math actually provides a staggering 19x bonus. Two Aces yield 380 bones instead of the standard 20. Adding Extra Good into the equation pushes this to 760 bones.
- A Sleeve Full: The game calculates total merges retroactively only from the exact second you acquire the tag. The first merge grants 20, the second 40, the third 60, and so on.
- Small & Mighty / Bigger & Better: Both of these tags execute a flawless, clean doubling of base bone yields. Merging two 6s with Bigger & Better yields 360 bones instead of 180.
- Summoning Circle: The tag successfully deposits the correct number of bones into your bank, but the visual bone animation fails to trigger on the screen.
Trait Triggers and Special Rules
- Best Friends: This tag strictly checks for identical dog sizes, not equal quantities. Dropping a Friendly 2 instantly bestows Friendly upon all other 2s in the Yard.
- Little Litter: The game identifies the smallest dog immediately before the Pack card triggers. Dropping a 2 into a Yard containing absolutely nothing but a 3 forces the tag to summon three 3s.
- Hop on Pop: You must physically drop the 6 from your hand to trigger the Miniature effect. A 6 deploying automatically via the Pack trait does nothing.
- Ouroboros: This mechanic occasionally malfunctions. Sometimes it immediately upgrades the resulting 4 right back into a 5, and sometimes it fails to trigger the random promotion entirely.
- Overachiever: Running the Goody Two Shampoos deck provides a baseline extra Dog Wash. Adding Overachiever mathematically pushes this to three total Dog Wash visits per goal completion.
- Dark Ritual: The “Demon” mentioned in the text translates mechanically to a red Queen sporting Crated, Timid, and Royal attributes.
- Monarch & High & Low: Both of these tags trigger perfectly even if the participating Royal or Miniature dogs suffer from Fleas.
- Jupiter: Gravity manipulation carries severe risks. If your floating pile breaches the top of the Yard for too long, it triggers the 10 second failure countdown even in zero gravity.
Conclusion
Mastering Dogpile requires a delicate balance of spatial awareness and ruthless deck optimization to conquer the Yard. This manual provides the exact roadmap you need to solve common overflow issues and completely break the game using overpowered tag combinations. Keep this strategy guide handy during your toughest runs to turn disastrous pileups into perfectly calculated victories. Apply these insights today and claim your rightful place as the ultimate Dogpile champion.

Leave a Reply