
Last Updated on 8 April, 2026
Surviving the brutal frost of My Winter Car requires more than just warm clothes; it demands a master mechanic’s touch to resurrect the legendary Corris Rivett. Many aspiring builders find themselves freezing in their garages, completely lost amidst missing suspension bolts and confusing aftermarket part catalogs. This manual solves that exact problem by providing a complete checklist of every single attachable car part, required spanner size, and hidden achievement in the game. Prepare your tools and follow our blueprint to successfully assemble your dream winter ride and conquer the icy roads ahead.
Table of Contents
- Acquiring Your Initial Corris Rivett
- Procuring Your Mechanical Components
- The Heart of the Beast: Engine Construction
- Keeping It Grounded: Suspension Setup
- Vital Systems: Auxiliary Installation
- Outer Shell: Body Work
- Cabin Comforts: Interior Fitment
- Customization: Aftermarket Parts and Rims
- Fleetari Upgrades and Essential Fluids
- Trophy Hunting: The Achievement Roadmap
- Conclusion
Acquiring Your Initial Corris Rivett
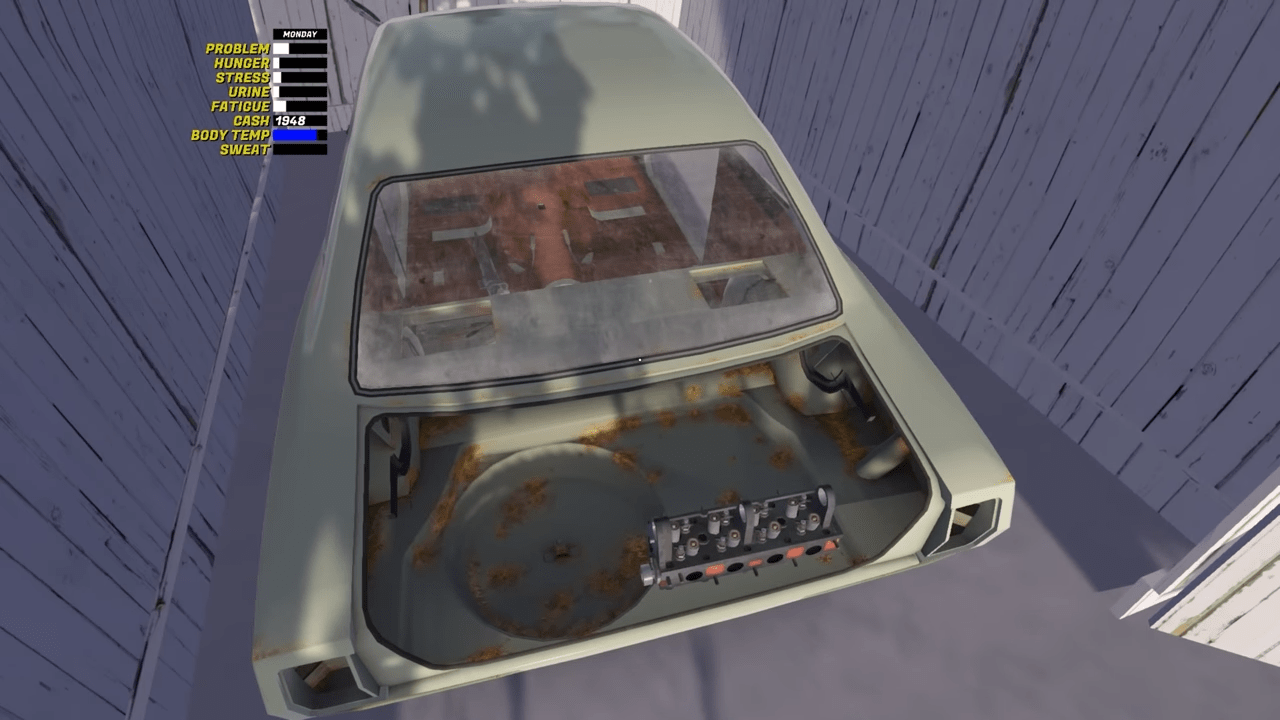
Your grand automotive project kicks off when you buy the Corris Rivett from the local firewood vendor for a very reasonable 500 mk. This transaction provides you with the bare car shell alongside a random assortment of miscellaneous parts. You might decide you do not want every single piece included in this starter bundle.
Procuring Your Mechanical Components
You have three distinct avenues available to source the exact components you need to assemble your Corris Rivett.
The Classifieds Magazine
You will utilize the Classifieds Magazine as your primary method for hoarding parts. You can buy this reading material at PSK for 15 mk. The listings printed inside generate completely at random and refresh every single Tuesday and Friday. This magazine supplies all original equipment manufacturer body parts, suspension pieces, engine hardware, and the majority of auxiliary items. You will also discover a specific section located in the top right corner dedicated to wheels, which occasionally come with tires already mounted.
To buy items from the magazine, you must locate the telephone numbers printed on the pages. The seller provides a short description, the specific parts included in the shipment, the total price in mk, and the puh, which means the phone number. You pick up your telephone and dial the exact digits on your keyboard to request the package via mail. The seller takes approximately two to three real life hours to deliver the items. The listed price does not correlate to the actual quality of the parts. Once the package finally arrives, you will receive an order notification paper at your apartment. If you face eviction, you might find this notification at your parents’ house. This piece of paper simply informs you that the package awaits your pickup at PSK and contains no specific details about the contents.
The Parts Magazine
You will locate the parts magazine resting on your garage table, although you hold the freedom to move it anywhere you please. You use this glossy catalog to order performance enhancements, visual exterior modifications, and aftermarket wheels. To submit an order, you take your finished letter to the PSK store. Walk over to the manual door at the right entrance to find the post box. You slide the envelope into the slot to dispatch it. You then pay for the parts and collect them using the exact same procedure as the Classifieds Magazine.
Fleetari Repair Shop
You can drive over to Fleetari’s shop to buy replacement engine components. Fleetari no longer stocks standard engine blocks and oil pans. He now focuses his inventory entirely on New Old Stock parts sealed in their original packaging. On the opposite wall of his garage, you will browse an assortment of performance parts. These items include upgraded alternators, high capacity fuel pumps, aggressive camshafts, and racing carburetors. Fleetari also offers a rev limiter to help you protect your fresh engine from catastrophic over-revving.
The Heart of the Beast: Engine Construction
Grab your complete spanner set and prepare to get your hands dirty. Below you will find the exact inventory of components and fastener sizes you need to assemble the Corris Rivett powerplant, broken down into logical sections.
The Short Block and Rotating Assembly
- Engine Block: Simply place the block onto the stand.
- Crankshaft: Simply drop this part into the block.
- Main Bearings: You require five of these. Each bearing needs two 10mm bolts.
- Piston: You require four of these. Each piston needs two 8mm bolts.
- Oil Pump: Secure it with two 6mm bolts.
- Oilpan: Secure it with ten 7mm bolts and one 13mm bolt.
- Crankshaft Pulley: Secure it with one 13mm bolt.
- Flywheel (Manual): Secure it with six 12mm bolts.
- Flex Plate (Automatic): Secure it with six 12mm bolts.
- Rear Plate: Simply install this component.
The Cylinder Head and Valvetrain
- Head Gasket: Simply lay this part down flat.
- Cylinder Head: Secure it firmly with ten 9mm bolts.
- Camshaft Standard: Secure it with two 6mm bolts.
- Rocker: You require eight of these. Each rocker needs two screws.
- Rocker Cover: Secure it with eight 7mm bolts.
- Camshaft Sprocket: Secure it with one 14mm bolt.
- Aux Shaft: Secure it with three 6mm bolts.
- Aux Shaft Sprocket: Secure it with one 14mm bolt.
- Timing Belt: Simply wrap this part around the sprockets.
- Timing Belt Cover: Secure it with two 6mm bolts.
Fuel, Air, and Exhaust Systems
- Fuel Pump: Secure it with two 7mm bolts.
- Stock Carburettor: Secure it with five 9mm bolts.
- Air Cleaner: Secure it with one 7mm bolt.
- Exhaust Headers: Secure it with eight 9mm bolts.
- Exhaust Manifold: Secure it with eight 9mm bolts.
Cooling and Accessories
- Water Pump: Secure it with four 7mm bolts.
- Water Pump Pulley: Secure it with four 8mm bolts. It shares these fasteners with the Fan.
- Fan: Secure it with four 8mm bolts.
- Fan Belt: Simply wrap this part around the pulleys.
- Thermostat: Simply install this component.
- Thermostat Housing: Secure it with two 8mm bolts.
- Alternator: Secure it with one 11mm bolt and one screw.
- Distributor: Secure it with one screw.
- Starter: Secure it with three 8mm bolts.
Transmission and Clutch
- Clutch Cover Plate (Manual): Secure it with six 8mm bolts. It shares these fasteners with the Clutch Disk and Clutch Pressure Plate.
- Clutch Disc (Manual): Secure it with six 8mm bolts. It shares these fasteners with the Clutch Cover Plate and Clutch Pressure Plate.
- Clutch Pressure Plate: Secure it with six 8mm bolts. It shares these fasteners with the Clutch Cover Plate and Clutch Disc.
- Manual Gearbox 4 Spd: Secure it with six 11mm bolts.
- Manual Gearbox 5 Spd: Secure it with six 11mm bolts.
- Automatic Gearbox 3 Spd: Secure it with six 11mm bolts.
Keeping It Grounded: Suspension Setup
Maintain maximum traction on the icy roads by meticulously installing the following suspension hardware.
Front Suspension and Brakes
- Front Lower Control Arm: You require two of these. Each arm needs one 14mm bolt.
- Front Upper Control Arm: You require two of these. Each arm needs two 14mm bolts.
- Front Shock Absorber: You require two of these. Each shock needs two 8mm bolts and one 12mm bolt.
- Front Link Left: Secure it with two 11mm bolts and one 12mm bolt.
- Front Link Right: Secure it with two 11mm bolts and one 12mm bolt.
- Front Left Brake Assembly: Secure it with two 12mm bolts and one 11mm bolt.
- Front Right Brake Assembly: Secure it with two 12mm bolts and one 11mm bolt.
Rear Suspension Structure
- Rear Axle Variants: You must select from BA, BB, CA, CB, EA, EB, NA, NB, SA, or SB. Whichever specific axle you select needs four 15mm bolts.
- Rear Lower Control Arm: You require two of these. Each arm needs one 13mm bolt.
- Rear Upper Control Arm: You require two of these. Each arm needs one 15mm bolt.
- Rear Shock Absorber: You require two of these. Each shock needs two 13mm bolts.
- Coil Spring: You require four of these in total.
Steering and Drivetrain
- Steering Column: Secure it with two 12mm bolts.
- Steering Rack (26 Regular): Secure it with four 9mm bolts.
- Steering Rack (33 Power Steering): Secure it with four 9mm bolts.
- Steering Shaft: Secure it with one 6mm bolt.
- Driveshaft: Secure it with four 8mm bolts.
- Wheel: You require four of these. Each wheel needs four 15mm bolts.
Vital Systems: Auxiliary Installation
These critical components link your separate systems together and permit the Corris Rivett to operate seamlessly.
Braking and Hydraulics
- Brake Master Cylinder: Secure it with four 8mm bolts.
- Power Brake Cylinder: Secure it with four 8mm bolts.
- Brake Lines: Secure them with five 7mm bolts.
Transmission Linkage and Exhaust Flow
- Manual Gear Lever: Simply install this component.
- Automatic Gear Lever: Secure it with one 6mm bolt.
- GT Gear Lever: Simply install this component.
- Clutch Cable: Secure it with one 7mm bolt.
- Pedal Box Manual: Secure it with four 8mm bolts.
- Pedal Box Automatic: Secure it with four 8mm bolts.
- Gearbox Crossmember: Secure it with two 14mm bolts.
- Exhaust Pipe Front: Secure it with one 7mm bolt and two 8mm bolts.
- Exhaust Pipe Rear: Secure it with one 9mm bolt and two 7mm bolts.
- Muffler: Secure it with one 8mm bolt.
Cooling Hoses, Fuel, and Electronics
- Radiator: Secure it with four 10mm bolts.
- Radiator Hose Top: Secure it with two screws.
- Radiator Hose Bottom: Secure it with two screws.
- Heater Box: Secure it with four 7mm bolts.
- Heater Hose Inlet: Secure it with two screws.
- Heater Hose Outlet: Secure it with two screws.
- Fuel Tank: Secure it with two 10mm bolts.
- Battery: Secure it with two 8mm bolts.
- Ignition Coil: Secure it with two 8mm bolts.
- Wiper Motor Assembly: Secure it with four 7mm bolts.
Outer Shell: Body Work
You will rely on the following exterior panels to shield your engine bay and interior from the harsh winter elements.
Front End and Hood
- Hood: Secure it with four 7mm bolts.
- Front Bumper: Secure it with two 10mm bolts.
- Front-Facelift Bumper: Secure it with two 10mm bolts.
- Front-GT Bumper: Secure it with two 10mm bolts.
- Front-Pre-Facelift Bumper: Secure it with two 10mm bolts.
- Facelift Grille: Secure it with two 9mm bolts.
- GT-Trim Grille: Secure it with two 9mm bolts.
- L-Trim Grille: Secure it with two 9mm bolts.
- LX-Trim Grille: Secure it with two 9mm bolts.
- SLX-Trim Grille: Secure it with two 9mm bolts.
- Grille Cover: Simply install this component.
Side Profiles and Doors
- Left Fender: Secure it with six 8mm bolts.
- Right Fender: Secure it with six 8mm bolts.
- Left Door: Secure it with four 8mm bolts.
- Left-Facelift Door: Secure it with four 8mm bolts.
- Right Door: Secure it with four 8mm bolts.
- Right-Facelift Door: Secure it with four 8mm bolts.
- Hubcap: You require four of these items.
Rear End and Lighting
- Facelift Bootlid: Secure it with four 8mm bolts.
- GT-Trim Bootlid: Secure it with four 8mm bolts.
- Pre-Facelift Bootlid: Secure it with four 8mm bolts.
- Rear-Pre-Facelift Bumper: Secure it with two 10mm bolts.
- Rear-Facelift Bumper: Secure it with two 10mm bolts.
- Left Headlight Assembly: Secure it with two 9mm bolts.
- Right Headlight Assembly: Secure it with two 9mm bolts.
- Left Rear Light: Secure it with two 8mm bolts.
- Right Rear Light: Secure it with two 8mm bolts.
Cabin Comforts: Interior Fitment
Transform the cold metal shell into a comfortable and functional driving environment using the interior assembly list.
Dashboard and Controls
- Dashboard: Secure it with two 7mm bolts.
- Dashboard Bottom Cover: Secure it with two screws.
- Dashboard Top Cover: Simply install this component.
- Instrument Panel: Secure it with two screws.
- Steering Wheel: Secure it with one 14mm bolt.
- Column Shroud Left: Secure it with one 8mm bolt.
- Column Shroud Right: Secure it with one 8mm bolt.
- Center Console: Secure it with two 6mm bolts.
- Hand Brake Lever: Secure it with two 7mm bolts and one 6mm bolt.
Seating Arrangements
- Driver Seat: Secure it with three 10mm bolts and one 8mm bolt.
- Passenger Seat: Secure it with three 10mm bolts and one 8mm bolt.
- Rear Seat Backrest: Secure it with two 12mm bolts.
- Rear Seat Bench: Secure it with two 12mm bolts.
Trim and Accessories
- Car Radio: Simply install this component.
- Ventilation Box: Secure it with four 7mm bolts.
- Fresh Air Duct: Secure it with one 8mm bolt.
- Parcel Shelf: Simply install this component.
- Extinguisher Clamp: Secure it with two 8mm bolts.
Customization: Aftermarket Parts and Rims
Elevate your Corris Rivett beyond factory specifications by ordering specialized hardware from the Parts Magazine. You can completely transform the aesthetic and performance utilizing a massive catalog of aftermarket items.
Aerodynamics and Exterior Styling
You can install an Air Dam Front Spoiler, a Lip Front Spoiler, a Ducktail Rear Spoiler, a Lip Rear Spoiler, a Rear Upper Spoiler, or a Rear Wing Spoiler. Enhance the body lines with Fender Flares for the FL, FR, RL, and RR positions. You can bolt on a Lightweight Fiberglass Hood, attach Flat Side Skirts for the left and right, or opt for the Hem Flared Side Skirts. Complete the rally look with a Rear Window Grille, Mudflaps, Rally Lights, Marker Lights, and Dual Car Antennas.
Interior Modifications and Gauges
Upgrade your cabin by installing Bucket Driver and Passenger Seats. Keep track of vital engine metrics by adding an AFR Gauge, a Tachometer, and a set of Extra Gauges. Improve your handling feel with a Rally Steering Wheel. For entertainment, you can slide in a Car CD Player and hook it up to dual Subwoofers.
Performance and Suspension Enhancements
Boost your exhaust flow by ordering Exhaust Pipe Front, Exhaust Pipe Side, Exhaust Pipe Rear, an Exhaust Muffler, and a Dual Exhaust Tip. You can extract more power using Chrome Headers, Long Chrome Headers, or Ceramic Coated Headers. Keep engine temperatures low with a High Performance Radiator or a Race Radiator. Improve acceleration response using a Sport Flywheel or a Racing Flywheel. Prepare for rough terrain by ordering a Skidplate, a 19L Safety Fuel Cell, Rally Springs rated at 7.5 inches and 200LB, and aftermarket Front and Rear Shock Absorbers.
Wheel and Rim Selections
You possess a fantastic array of wheel designs to choose from. You can mount 13 Inch Steel Wheels, 14 Inch Steel Wheels, SLX/Sport Wheels, Yellow Steel Wheels, Corris Racing Wheels, Spoke Wheels, Slot Wheels, Octo Wheels, Turbine Wheels, Alloy Wheels, or rugged Rally Wheels.
Fleetari Upgrades and Essential Fluids
When you take a trip to Fleetari’s shop, you gain access to specific high-performance upgrades designed to violently increase your horsepower.
Fleetari Performance Components
- 2 Barrel Carb: Secure it with five 9mm bolts.
- 4 Barrel Racing Carb: Secure it with five 9mm bolts.
- Camshaft Fast Road: Secure it with two 6mm bolts.
- Camshaft Road Sprint: Secure it with two 6mm bolts.
- Camshaft Rally: Secure it with two 6mm bolts.
- Camshaft Race: Secure it with two 6mm bolts.
- High Performance Alternator: Secure it with one 11mm bolt and one screw.
- High Performance Fuel Pump: Secure it with two 7mm bolts.
- Rev Limiter: Secure it with one screw.
Consumables and Safety Items
You must gather your necessary consumable liquids and items to guarantee the car functions and legally passes safety inspections. You require an Alternator Belt, a bottle of Automatic Transmission Fluid, two bottles of Brake Fluid, a reliable Car Battery, two Car Light Bulbs, a jug of Coolant, a Fire Extinguisher, a tank full of Gasoline, a jug of Motor Oil, a fresh Oil Filter, four Spark Plugs, and a reflective Warning Triangle.
Trophy Hunting: The Achievement Roadmap
Our roadmap categorizes the newest achievements into five dedicated groups. Please note that a few unconfirmed secrets still linger undiscovered within the game.
World and Player Exploits
- 2500mk worth of purchases in PSK Market: You must spend a cumulative total of 2500mk inside the PSK store.
- Bad Guy: You must successfully serve your entire jail sentence and get out.
- Case solved!: You must consume an entire full case of beer.
- Darwin Award: You must physically detach the PTO shaft while the machinery remains running.
- He is pissed: You must intentionally provoke the man standing near the hockey ring by driving a vehicle onto the ice, then wait patiently for him to shoot at you.
- Hypothermia warrior: You must drink until you become drunk and then let yourself freeze to death.
- Problem gone: You must figure out how to completely eliminate your problem bar.
- Winter food reserve: You must consume enough food to make your player weigh exactly 150kg.
Driving Cars and Corris Milestones
- Historical Corris Rivett (L, LX, SLX, GT): You must successfully pass the strict historical inspection using the precise Rivett model matching your VIN.
- You’ve got plates: You must successfully pass the standard vehicle inspection.
- Rally finished with flat tire: You must cross the rally finish line while rolling on a flat tire.
- Wizard: You must complete an ice racing practice lap clocking in under 55 seconds.
- It runs!: You must successfully turn the ignition key and start the Rivett.
- 100, 1000 and 10000km: You must log the stated amounts of kilometers while driving your Rivett.
- Pushed the Taxi over 500 000 km: You must drive the Machtwagen continuously until the odometer clicks past 500,000 kilometers.
- Smoker dies: You must perish in a vehicle crash while actively smoking a cigarette.
- A true hillbily: You must drive the slow Kekmet tractor all the way to the PSK market.
- Jonne drive-in: You must successfully order a burger at PSK while sitting atop the Jonnez.
The Permadeath Challenges
- And its gone!: You must die while actively playing on a permadeath save file.
- Can’t stop smoking now…: You must smoke approximately 40 to 60 cigarettes.
- 200 km/h for 10 seconds: You must sustain a blistering speed of 200km/h for 10 consecutive seconds without crashing.
- Kiddy champ: You must secure a first place finish in the Junior Rally.
- Flyng Finn: You must secure a first place finish in the Amateur Rally.
- Government investor: You must fully pay off any fine handed down to you.
- Ten weeks in Mortal without dying: You must survive for ten straight weeks in Mortal mode without experiencing a single death.
- Local hero: You must emerge victorious in the local ice track race.
- Prepper: You must drink booze inside Pena’s car while he pushes the speedometer over 90km/h.
Occupational Jobs and Income
- Finnish champagne at the winners circle: You must drink a flawless batch of perfect kilju.
- Free spirit: You must formally reject signing the employment contract at Futufon.
- Full of crap: You must pump the Gifu completely full of raw sewage.
- It is Friday at the job: You must consume some alcohol while clocked in at Futufon.
- Machine operator: You must successfully operate the firewood cutter.
- Non-worker by trade: You must remain completely unemployed for one full month.
- Over 1000mk from Megaveto: You must win a minimum of 1000mk by gambling on sports betting.
- Poker master: You must accumulate over 900mk playing the video poker machine.
- Slot master: You must accumulate over 900mk playing the casino slots machine.
- Salary increase: You must work hard enough to earn a pay raise at Futufon.
- Scrap king: You must haul and sell over 1000kg of scrap metal directly to Fleetari.
- Taxi driver: You must successfully transport and drop off your very first taxi customer.
- Thousand Boxes: You must pack an exhausting total of one thousand chargers at Futufon.
- Tutorial finished: You must complete the introductory taxi job tutorial provided by the taxi guy.
- You fooled someone: You must trick someone into buying an item for at least 100mk at the flea market.
Computer Games Mastery
- Full stash: You must fully beat the game Ojasta Alkoon.
- Philosophy Master: You must reach the prestigious banker rank inside Filosofiapeli.
- Catch-A-Fish: You must successfully hook the UKK fish while playing Fishgame.
- Gauntlet survivor: You must survive and beat the 20th level of Run the Gauntlet.
- Grill master: You must perfectly serve 20 customers in Grillisimulaattori.
- You are the wall: You must destroy the final boss program in Pasi Invaders.
- Waving for victory: You must cross the finish line first in the Johnny F. Kemedy Racing Challenge.
- I am Santa Claus: You must collect all 20 hidden presents scattered across the fourth level of Joulupukin Joulustressi.
- PTSD: You must defeat the final boss entity of Massacre and execute a successful escape.
- Wow, look at that Chopin there: You must play the first 13 notes of Ukko Nooa perfectly by pressing C C C E D D D F E E D D C.
- Kahen kilon siika!: You must reel in a siika fish boasting a net weight of 2 kilograms or heavier in Pro Pilkki.
- Engine started!: You must start your very first singleplayer race on the Imperian rally track in Global Rally Grand Prix 95.
- A cure for illness: Complete the final punishing level of Rapula.
- Aiming like a pro: You must achieve a score higher than 34 points in Sormileikki.
- Seek and you shall find: You must reach the end of World’s Man by successfully finding the truth.
- My finger slipped: You must catch the flasher with a lightning fast reaction time of 0.12 seconds or less in Wild Vest.
- Saved by the bell: You must survive and beat the turku game.
Conclusion
Transforming a bare metal shell into a fully functional Corris Rivett is a massive triumph that will keep you safe in the harsh winter climate. By utilizing our exhaustive parts directory and detailed achievement roadmap, you have completely eliminated the frustrating guesswork of bolt sizes and missing components. You are now fully equipped to tune your engine to perfection, pass your strict vehicle inspections, and dominate the local ice tracks. Keep your coolant topped off, drive safely on the slippery highways, and enjoy your ultimate mechanic survival experience.

Leave a Reply