

Last Updated on 4 September, 2026
Welcome to the ultimate guide for pushing the absolute limits of TBH: Task Bar Hero. If you want to conquer the final stages of the game without draining your resources or spending countless hours grinding for elusive materials, you have arrived in the right place.
This comprehensive guide focuses on an incredibly efficient approach to the game. We will explore how to dominate the battlefield using a highly optimized budget Ranger build and an ingeniously crafted Undying Knight strategy. Surprisingly, little investment is necessary to clear Torment 3 to 10. You do not need to build a flawless endgame team or chase the absolute pinnacle of gear. The primary objective is simple. We want to clear the content and defeat the formidable 3 to 10 boss using the lowest possible investment.
Please note that this is a final push strategy. You cannot complete this setup in just a few short hours. You must achieve a respectable character level of 80 or higher and completely max out your skill tree before you attempt this run. Treat the items listed in this guide as your minimum baseline rather than your maximum ceiling. Gear is incredibly cheap on the market right now, so you should constantly look for affordable upgrades and purchase necessary materials whenever you spot a good deal. If you already possess equipment superior to the items mentioned here, you will clear the content with even greater ease.
Table of Contents
Skill Tree and Rune Mastery
Your first priority is unlocking the correct abilities to maximize your damage output. You need to activate all the available damage nodes within your interface. Additionally, you must equip the Rune of Brevity to ensure your build functions properly.
For your core abilities, you will rely entirely on two specific skills to carry your runs. You must equip Rapid Fire and Piercing Arrow. These two skills provide the necessary offensive pressure to break through enemy lines and whittle down difficult bosses.
You must ignore Dodge Chance until the very end of your progression. It is unnecessary for the core functionality of this build.

The Baseline Equipment Loadout
To keep your investment strictly minimal, this build utilizes a maximum item rarity of Immortal and a maximum material rarity of Legendary.
Below is the definitive table detailing the exact baseline gear, decorations, and engravings you need to succeed:
| Equipment Slot | Item Name & Details | Decorations | Engravings |
|---|---|---|---|
| Bow | Shadow Bow (Immortal, Level 80) | 2x T3 Physical Damage (Amethyst, Rare) | T3 Physical Damage (Spider Silk, Uncommon) |
| Arrow | Fate Arrow (Immortal, Level 50) | 2x T3 % Physical Damage (Amethyst, Rare) | T5 % Increased Attack Damage (Harpy Feather, Legendary) |
| Helmet | Dimensional Helmet (Legendary, Level 80) | 2x T2 % Increased Max HP (Amber Gem, Uncommon) | None |
| Armor | Dimensional Armor (Immortal, Level 80) | 2x T3 Max HP (Amethyst, Rare) | T3 Max HP (Bat Wing Membrane, Rare) |
| Gloves | Dimensional Gloves (Immortal, Level 80) | 2x T2 % Increased Max HP (Amber Gem, Uncommon) | T3 Max HP (Bat Wing Membrane, Rare) |
| Boots | Dimensional Boots (Immortal, Level 80) | 2x T2 % Increased Max HP (Amber Gem, Uncommon) | T3 % Damage Reduction (Bat Wing Membrane, Rare) |
| Amulet | Platinum Amulet (Legendary, Level 20) | T4 Max HP (Turquoise, Legendary), T4 % Increased Attack Speed (Garnet, Legendary) | None |
| Earring | Platinum Earring (Immortal, Level 20) | 2x T1 % Increased Movement Speed (Minor Emerald, Common) | T2 % Increased Movement Speed (Poisonous Herb, Uncommon) |
| Ring | Platinum Ring (Legendary, Level 20) | 2x T2 % Increased Attack Speed (Jade Stone, Uncommon) | None |
| Bracer | Ethereal Bracer (Rare, Level 80) | T4 % Increased Attack Speed (Garnet, Legendary) | None |
The Importance of Max HP
When you review the equipment table, you might immediately question why a damage focused Ranger build relies so heavily on Max HP decorations and engravings. The answer lies in the harsh reality of the final stages.
Specific enemy mobs heavily populate the late game. Ranged enemies, in particular, possess the capability to strike you multiple times throughout a single attempt. You absolutely need this extra health pool to survive at least one direct hit. When you combine this expanded health pool with the single point we allocate into Life Leech, you can quickly recover the damage you sustain and stay in the fight.
You must remember one critical warning. Some monsters inflict elemental damage. These specific elemental attacks will instantly kill you regardless of how much health you stack. When you encounter these enemies, the game mostly becomes a test of random number generation.
Crucial Boss Tactics and Progression
Playing through the later stages of TBH requires strategic finesse rather than pure brute force. Here are the specific tactics you need to deploy for various challenges.
Farming and Progression
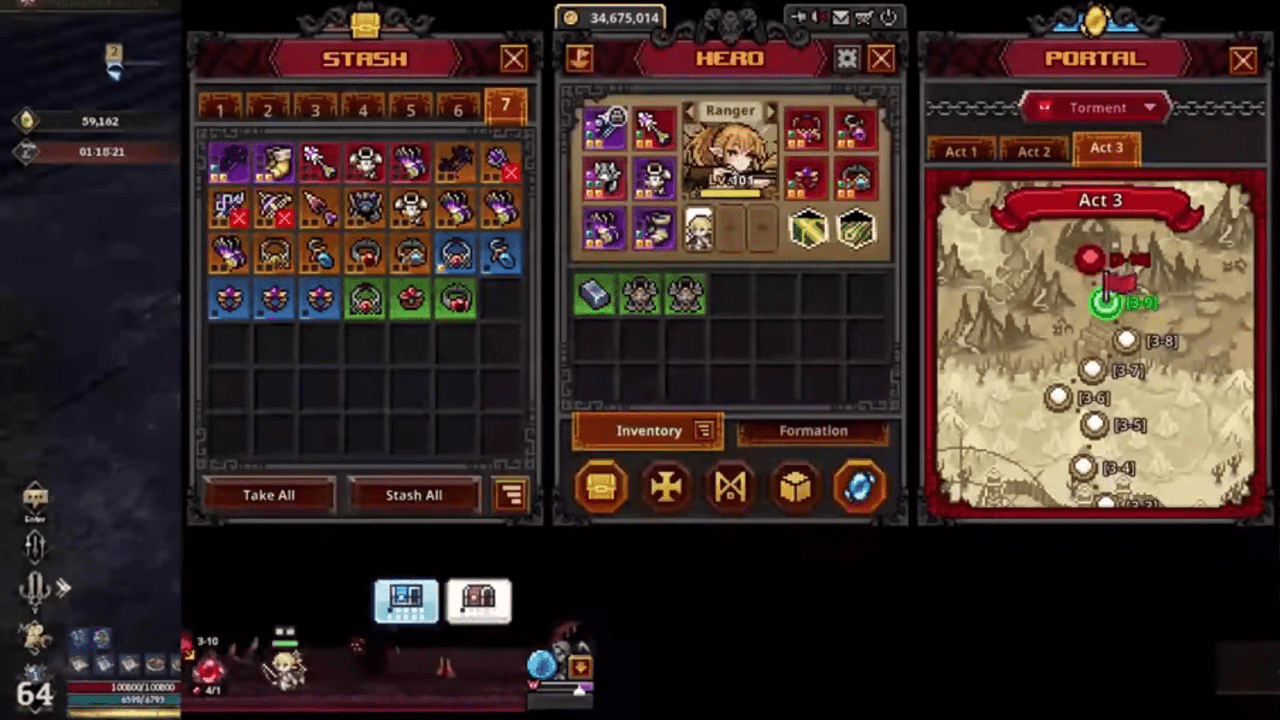
You can easily acquire your baseline gear through simple persistence. You can leave the game running for extended periods and utilize AFK farming to collect lucky Immortal drops. Alternatively, you can take advantage of the current market economy. You can completely bypass the grind by purchasing these extremely cheap items directly for around three cents.
Defeating the Torment 2 to 10 Boss
Many players struggle significantly with the Torment 2 to 10 boss. If you find yourself hitting a wall here, you should immediately transition to a stall focused party composition. You need to deploy a Priest utilizing the Resurrection skill alongside a Knight acting as a pure decoy. Incredibly, your Knight only needs to be level 20 to make this work. This simple stalling strategy boasts a massive success rate of over seventy percent.
Conquering the Harder Stages 3 to 3 through 3 to 10
You will not maintain a perfect clear rate on the brutal stages leading up to the finale. Bad monster positioning will inevitably ruin some of your Ranger runs when a random projectile slips past your defenses. When this happens, you should simply enable the Auto Retry feature and let the game cycle through attempts until the odds align in your favor.
Vanquishing the Final Boss 3 to 10
When you finally reach the 3 to 10 climax, you need to abandon the solo Ranger strategy and field a complete party composition. You must bring a Priest utilizing Blessing of Might and a Sorcerer completely focused on Cold Damage.
Avoiding Equipment Quality Traps
Players often make a fatal mistake when evaluating their equipment. Many players naturally assume that a higher item rarity automatically translates to a superior piece of gear. This assumption is entirely wrong, especially for the Ranger class.
Consider a practical example involving two different pairs of gloves. You might look at an Immortal pair of gloves and a lower rarity pair and instantly choose the Immortal one based purely on the rarity label. However, you must always look closer at the specific stat values.
An Immortal glove might offer additional base damage and a modest seventeen percent Attack Speed increase. Meanwhile, a lower quality pair might offer a superior nineteen percent Attack Speed increase. Because the primary objective of the Ranger is to maximize raw damage output, you will find that offensive stats hold significantly more value than defensive ones.
This concept applies to every single equipment slot. A level 50 Legendary amulet featuring Attack Speed and a Critical Chance Multiplier will easily outclass a level 80 Immortal amulet heavily burdened with defensive stats. You must always compare the actual stat rolls instead of judging your gear solely by its rarity or quality tier.
The Undying Knight Synergy
As you push into Hell Act 3, you will encounter distinct wall stages. Stage 3 to 7 serves as a perfect example of this frustrating phenomenon. These levels feature widely spread out enemies that deal an incredibly high amount of damage per second.
You naturally want to ensure your tank survives the onslaught. Unfortunately, even a level 85 Knight or Priest wearing excellent equipment will fall rapidly in these zones. Because the mid to late game demands an astronomical amount of experience points just to gain a single level, you cannot simply grind past these walls. Instead, you must combine three specific skills across your party members to transform your Knight into an unstoppable revenant.
The Priest Role
The Priest often functions as a better tank than the Knight due to her innate resistances and continuous healing. Her basic Heal ability operates on an eight second cooldown and scales directly with the target maximum HP. This makes her exceptionally useful for the entire game. By making the Priest an off tank, you create the foundation of this strategy.
The Knight Limitation
The Knight features a capstone skill called Unyielding Will. The game describes this skill as allowing the Knight to rise again with a percentage of his health once per stage when near death. The description implies it only works one time, which makes it seem useless if you die early in the run. However, the description is entirely misleading. Unyielding Will actually recharges after triggering. The major drawback is its massive fifty second cooldown timer. Normally, the Knight cannot possibly survive long enough on these difficult stages to ever use the skill a second time.
The Synergistic Loop
This is where the magic happens. You can force Unyielding Will to interact beautifully with the Priest Resurrection ability, which features a forty five second cooldown.
- The Knight absorbs fatal damage while Unyielding Will is available, and the skill instantly brings him back to life.
- The Priest immediately uses her basic Heal to restore the Knight to nearly full health.
- The Knight inevitably absorbs fatal damage again while Unyielding Will is still stuck on its long cooldown.
- The Priest casts Resurrection to revive the Knight.
- The Resurrection cast completely resets the Knight internal timers, which means Unyielding Will becomes instantly ready to trigger again.
Executing the Undying Tank
As long as you can keep your Priest alive, your Knight will continually bounce back to his feet every twenty three to twenty five seconds. This means you only need your Knight to survive roughly twenty seconds at a time. The Priest easily picks up the slack during his brief downtime. Keep her safely positioned in the middle or rear of your formation and gear her entirely for maximum survivability.
Conclusion
You do not need to hunt down Cosmic or Divine rarity items to achieve total victory in this fantastic idle adventure. Leveraging smart skill synergies and carefully selected baseline stats allows you to easily bypass the steepest difficulty spikes the game has to offer. Save your precious premium materials for future content updates or freely trade them on the Steam market for extra profit. Jump back into your taskbar window today and watch your budget squad effortlessly tear through the final Act.


Leave a Reply